게임 모드 - 캐릭터 - 플레이어 컨트롤러 - 액터 순으로 생성
1. GameModeBase 생성

Game 폴더를 만들어 안에 넣어주고, 상위 경로를 include에 추가해준다.

2. 모듈 추가하기
프로젝트이름.Build.cs 파일에 다음을 추가해준다.
PublicIncludePaths.AddRange(new string[] { "프로젝트이름" });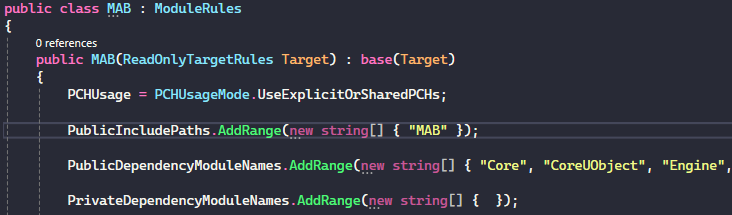
이 때, 빌드하면 컴파일 오류가 뜨는데 이를 라이브코딩으로 리로드 해야 한다.
엔진 끄고 빌드하면 계속 오류가 난다.
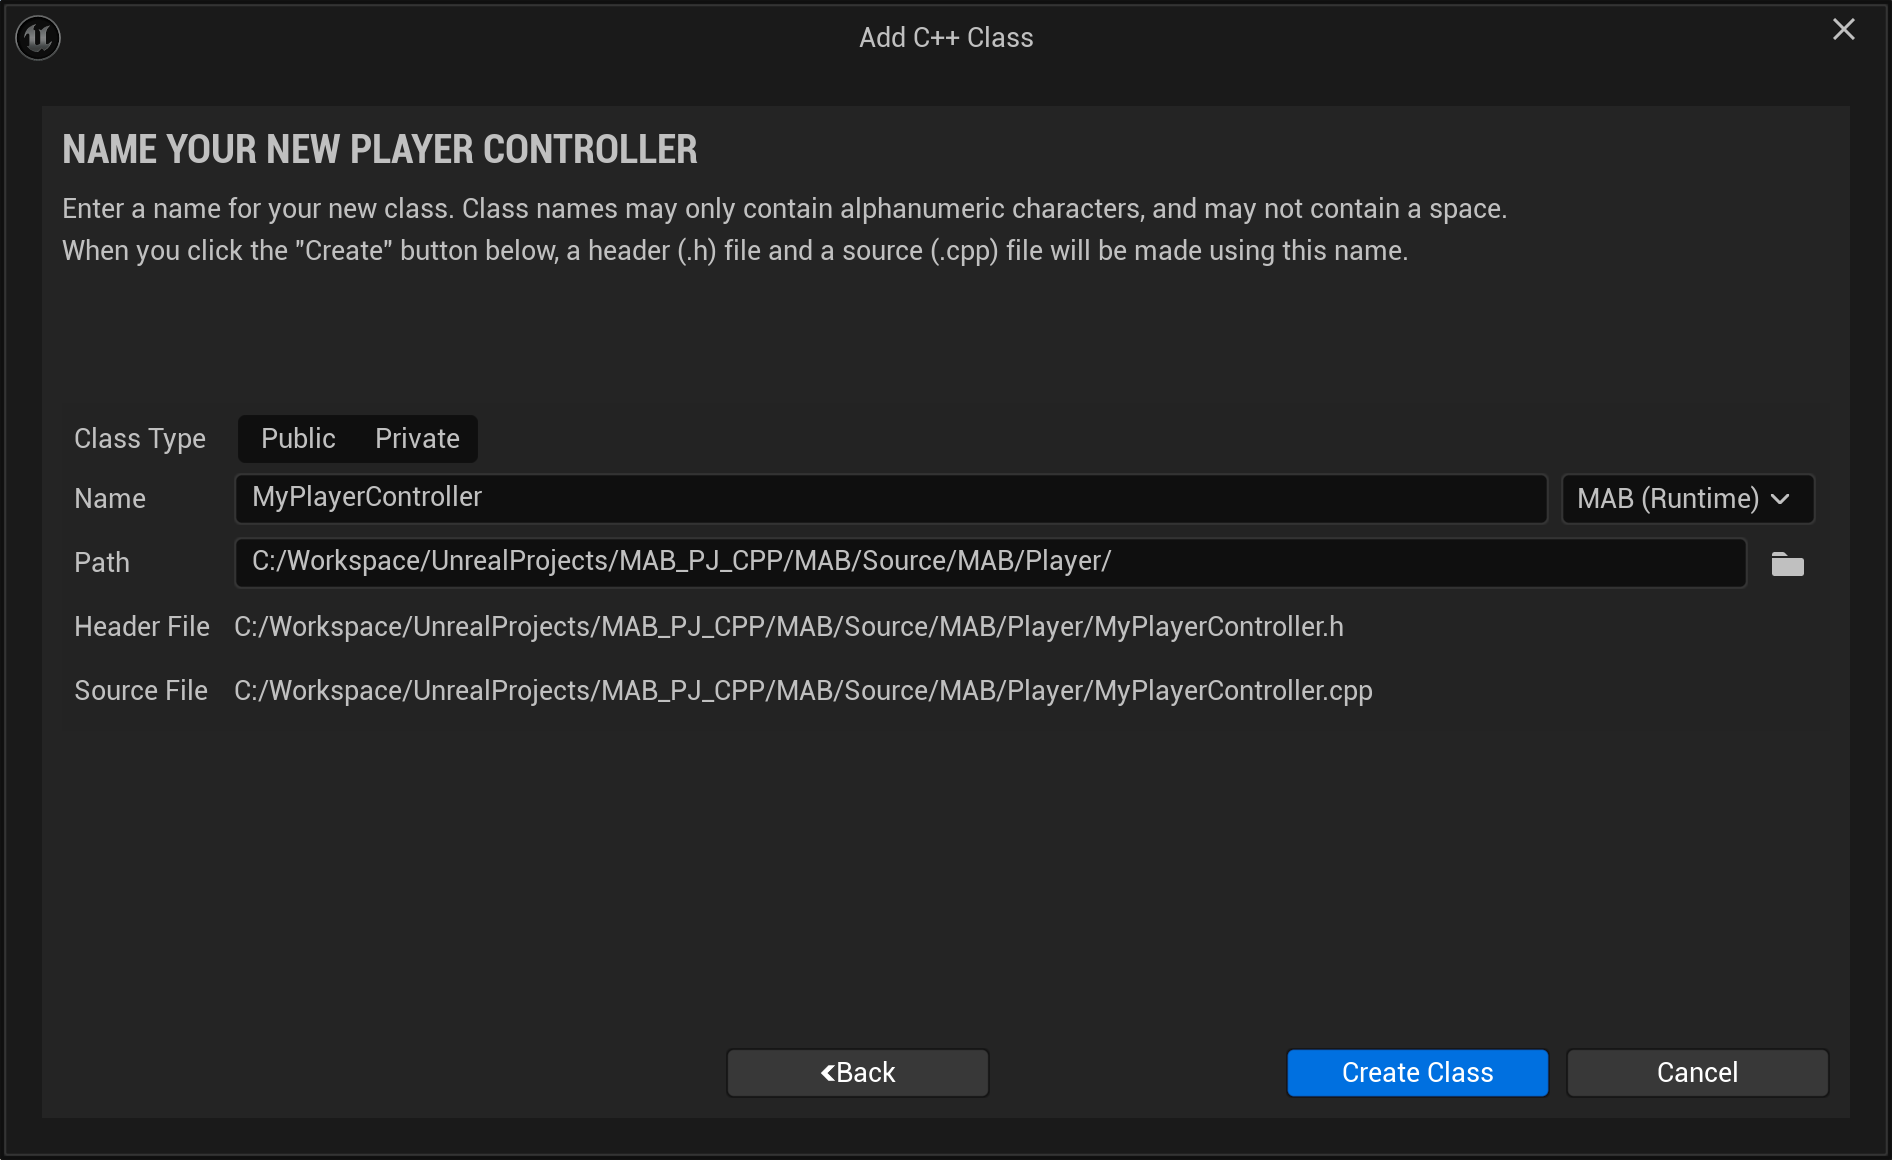
3. 플레이어 컨트롤러, 캐릭터 추가
1) 플레이어 컨트롤러
2) 캐릭터 - 베이스용 캐릭터 추가
플레이어와 npc 등 모든 캐릭터의 베이스가 될 캐릭터

3) 캐릭터 - 플레이어용 캐릭터 추가
위에서 생성한 CharacterBase를 추가한다.

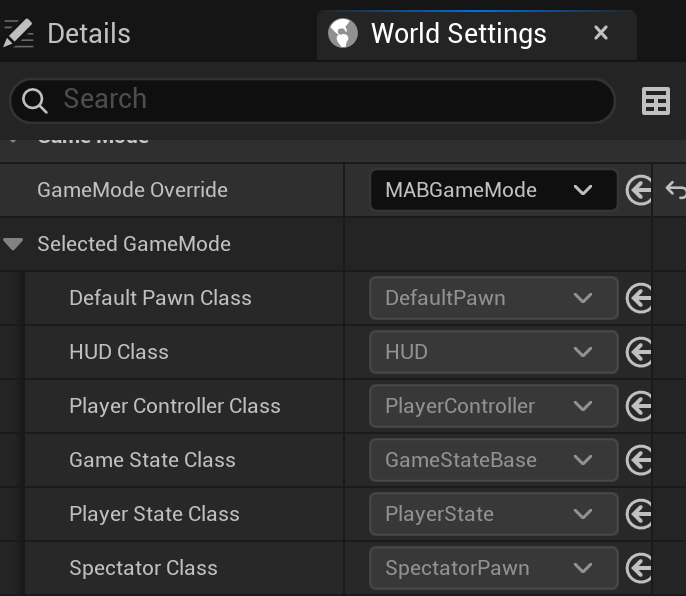
4. 게임 모드 설정하기
World Settings에서 생성한 게임 모드를 설정할 수 있다.
여기서 우리가 생성한 캐릭터, 컨트롤러를 GameMode의 소스코드로 설정해야 한다.
이는 CDO(ClassDefaultObject)이기 때문에, 엔진 시작 시에 초기화된다.
따라서 GameMode의 코드 수정 후에는 엔진을 다시 실행해주어야 적용되는 것을 볼 수 있다.
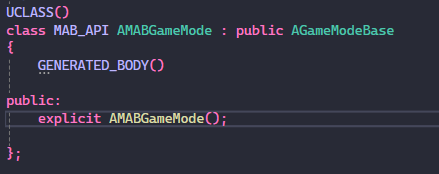
1) 생성자 추가
2) 생성자에서 DefaultPawnClass 설정
CDO 설정에 사용되는 ContstructorHelpers를 사용하여 Class를 불러올 것이다.
에셋 레퍼런스를 참조하여 Object 혹은 Class 참조를 불러온다.
에셋 레퍼런스 복사. 블루프린트에서 만든 것을 사용하였다.
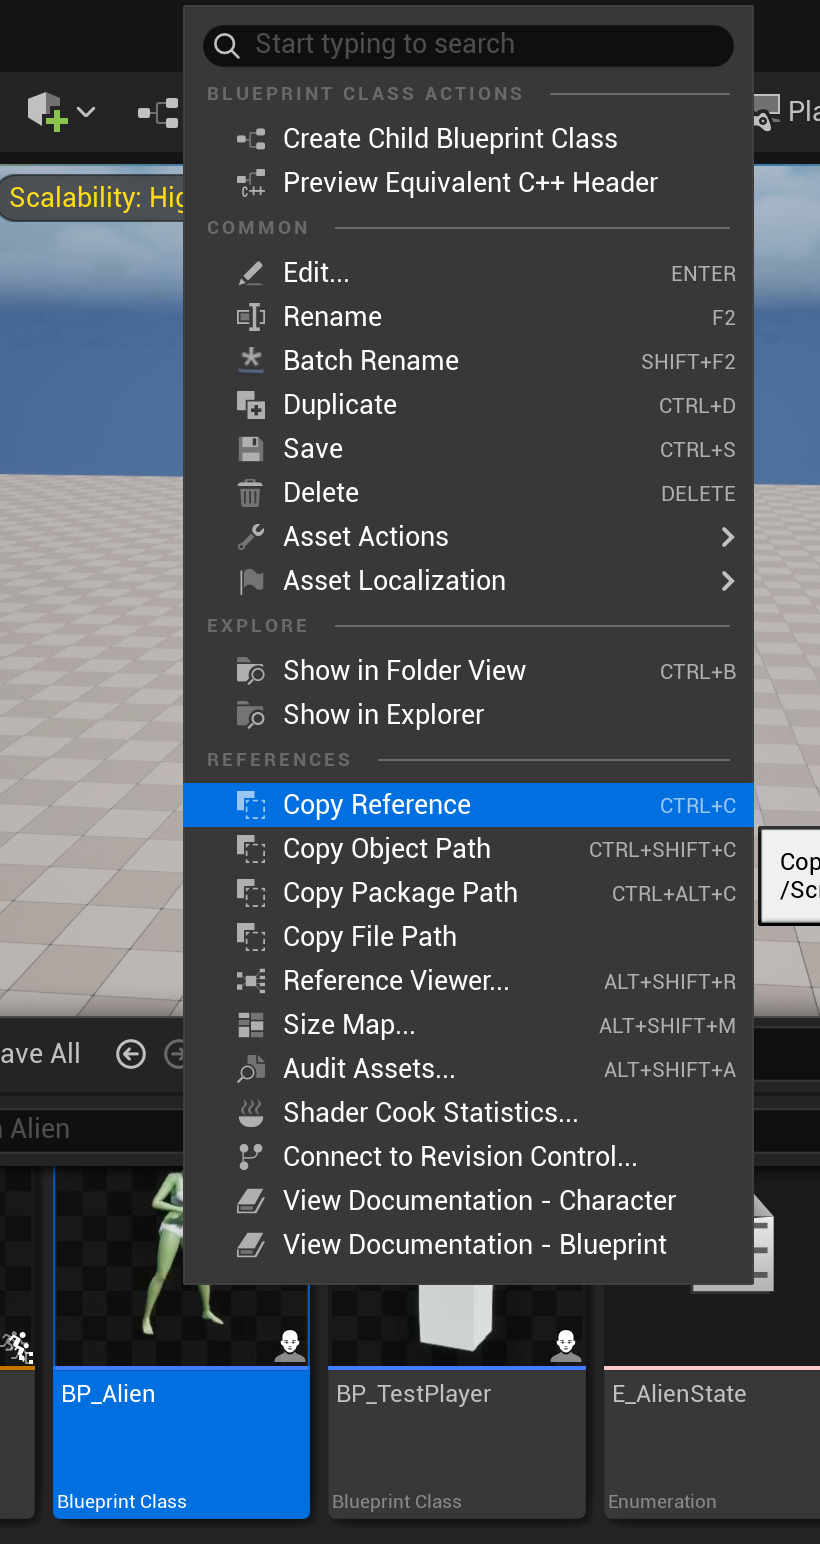
다음과 같이 에셋 참조.
에셋에서 클래스 참조 시 끝에 _C로 불러와야 한다. (코딩규칙)
클래스 유효 시 DefaultPawnClass에 할당.
#include "Game/MABGameMode.h"

AMABGameMode::AMABGameMode()
{
	// set default pawn class.
	ConstructorHelpers::FClassFinder<APawn> AlienClassRef(TEXT("/Game/Blueprints/Alien/BP_Alien.BP_Alien_C"));
	if (AlienClassRef.Succeeded())
	{
		DefaultPawnClass = AlienClassRef.Class;
	}
}
3) 플레이어 컨트롤러 설정
생성한 PlayerController class를 참조하고 PlayerControllerClass에 할당.
// Fill out your copyright notice in the Description page of Project Settings.


#include "Game/MABGameMode.h"

AMABGameMode::AMABGameMode()
{
	// set default pawn class.
	ConstructorHelpers::FClassFinder<APawn> AlienClassRef(TEXT("/Game/Blueprints/Alien/BP_Alien.BP_Alien_C"));
	if (AlienClassRef.Succeeded())
	{
		DefaultPawnClass = AlienClassRef.Class;
	}

	// set player controller class.
	ConstructorHelpers::FClassFinder<APlayerController> PlayerControllerClassRef(TEXT("/ Script / MAB.MABPlayerController"));
	if (PlayerControllerClassRef.Succeeded())
	{
		PlayerControllerClass = PlayerControllerClassRef.Class;
	}
}
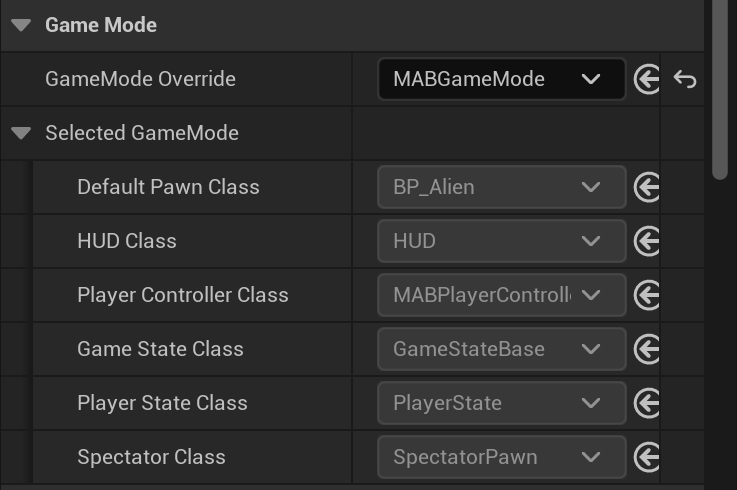
할당된 모습.
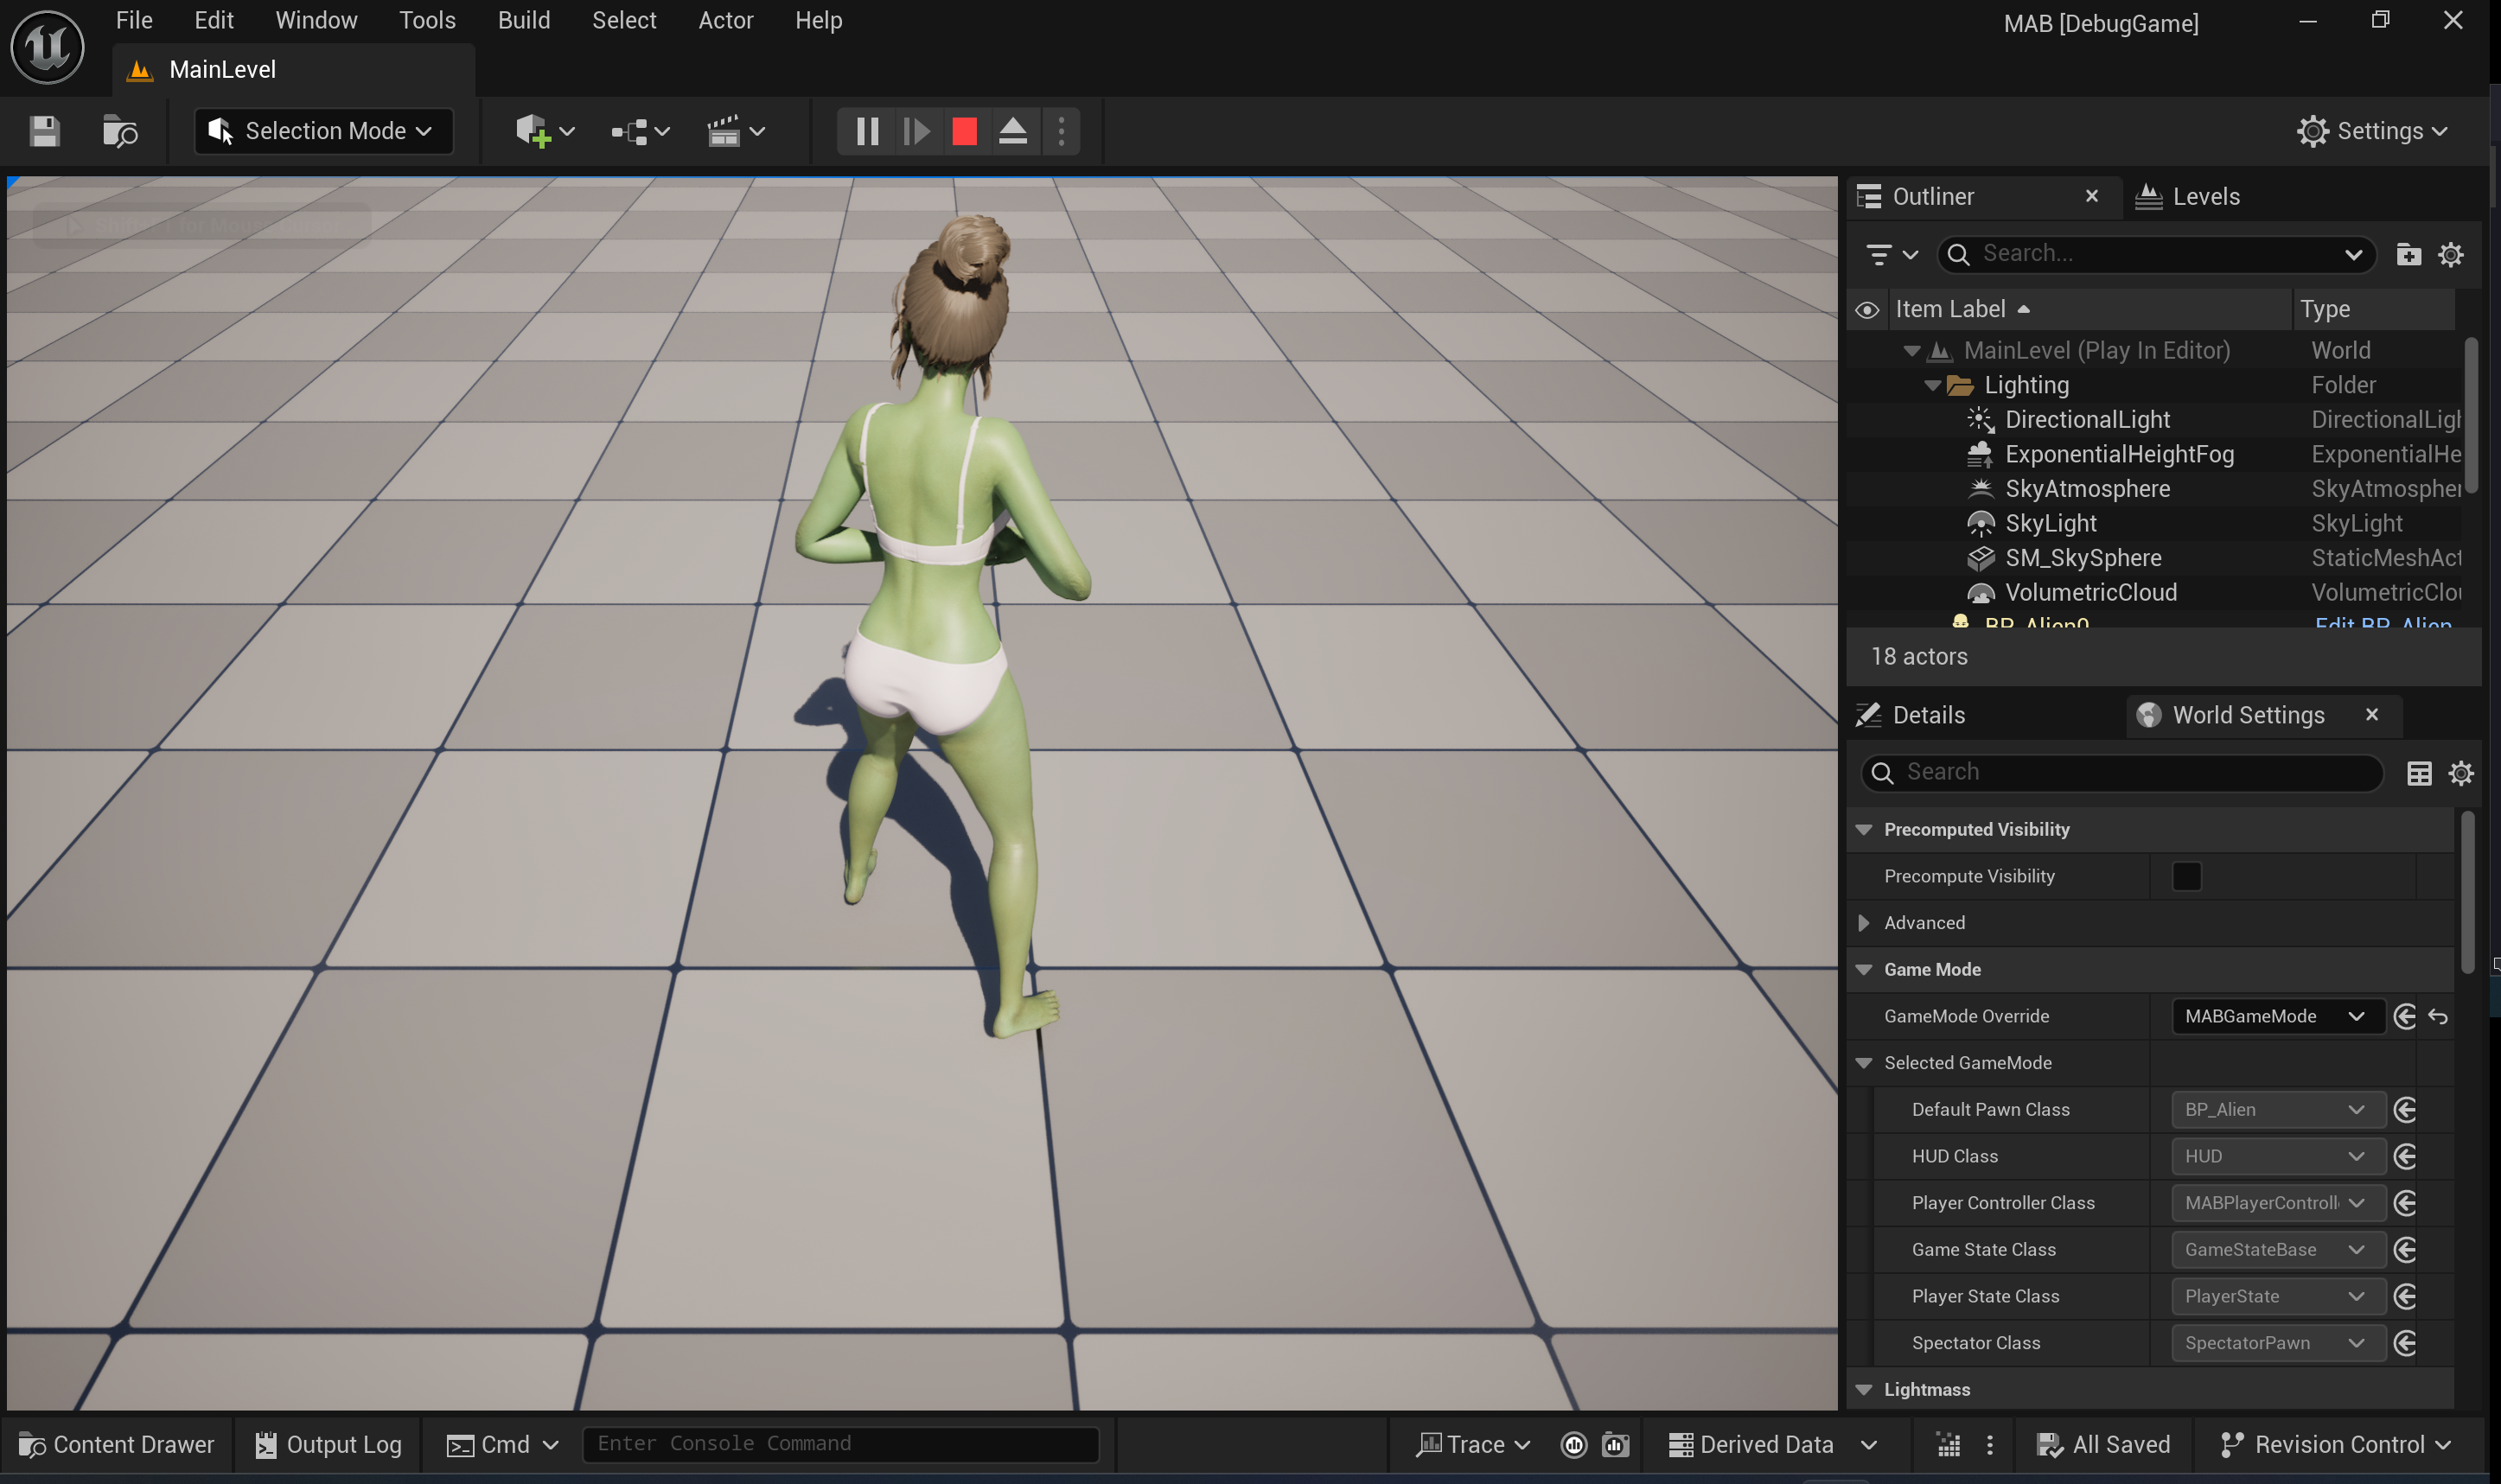
4) 실행 결과
5. 마우스 입력 넣기
게임 내에 마우스 input을 넣기 위해 생성한 컨트롤러에 추가.
부모인 PlayerController에서 상속받은 BeginPlay 오버라이드.
// Fill out your copyright notice in the Description page of Project Settings.

#pragma once

#include "CoreMinimal.h"
#include "GameFramework/PlayerController.h"
#include "MABPlayerController.generated.h"

/**
 *
 */
UCLASS()
class MAB_API AMABPlayerController : public APlayerController
{
	GENERATED_BODY()

protected:
	virtual void BeginPlay() override;
};
플레이어의 input/controller에 관한 사용자 인풋을 관리하는 구조체 FInputModeGameOnly로 SetInputMode.
// Fill out your copyright notice in the Description page of Project Settings.


#include "GameFramework/PlayerController.h"
#include "Player/MABPlayerController.h"

void AMABPlayerController::BeginPlay()
{
	Super::BeginPlay();

	FInputModeGameOnly GameOnlyInputMode;
	SetInputMode(GameOnlyInputMode);
}
6. 액터 설정하기.
블루프린트 프로젝트에서 만들었던 액터를 cpp로 만들어보자.
1) cpp 액터 생성하기
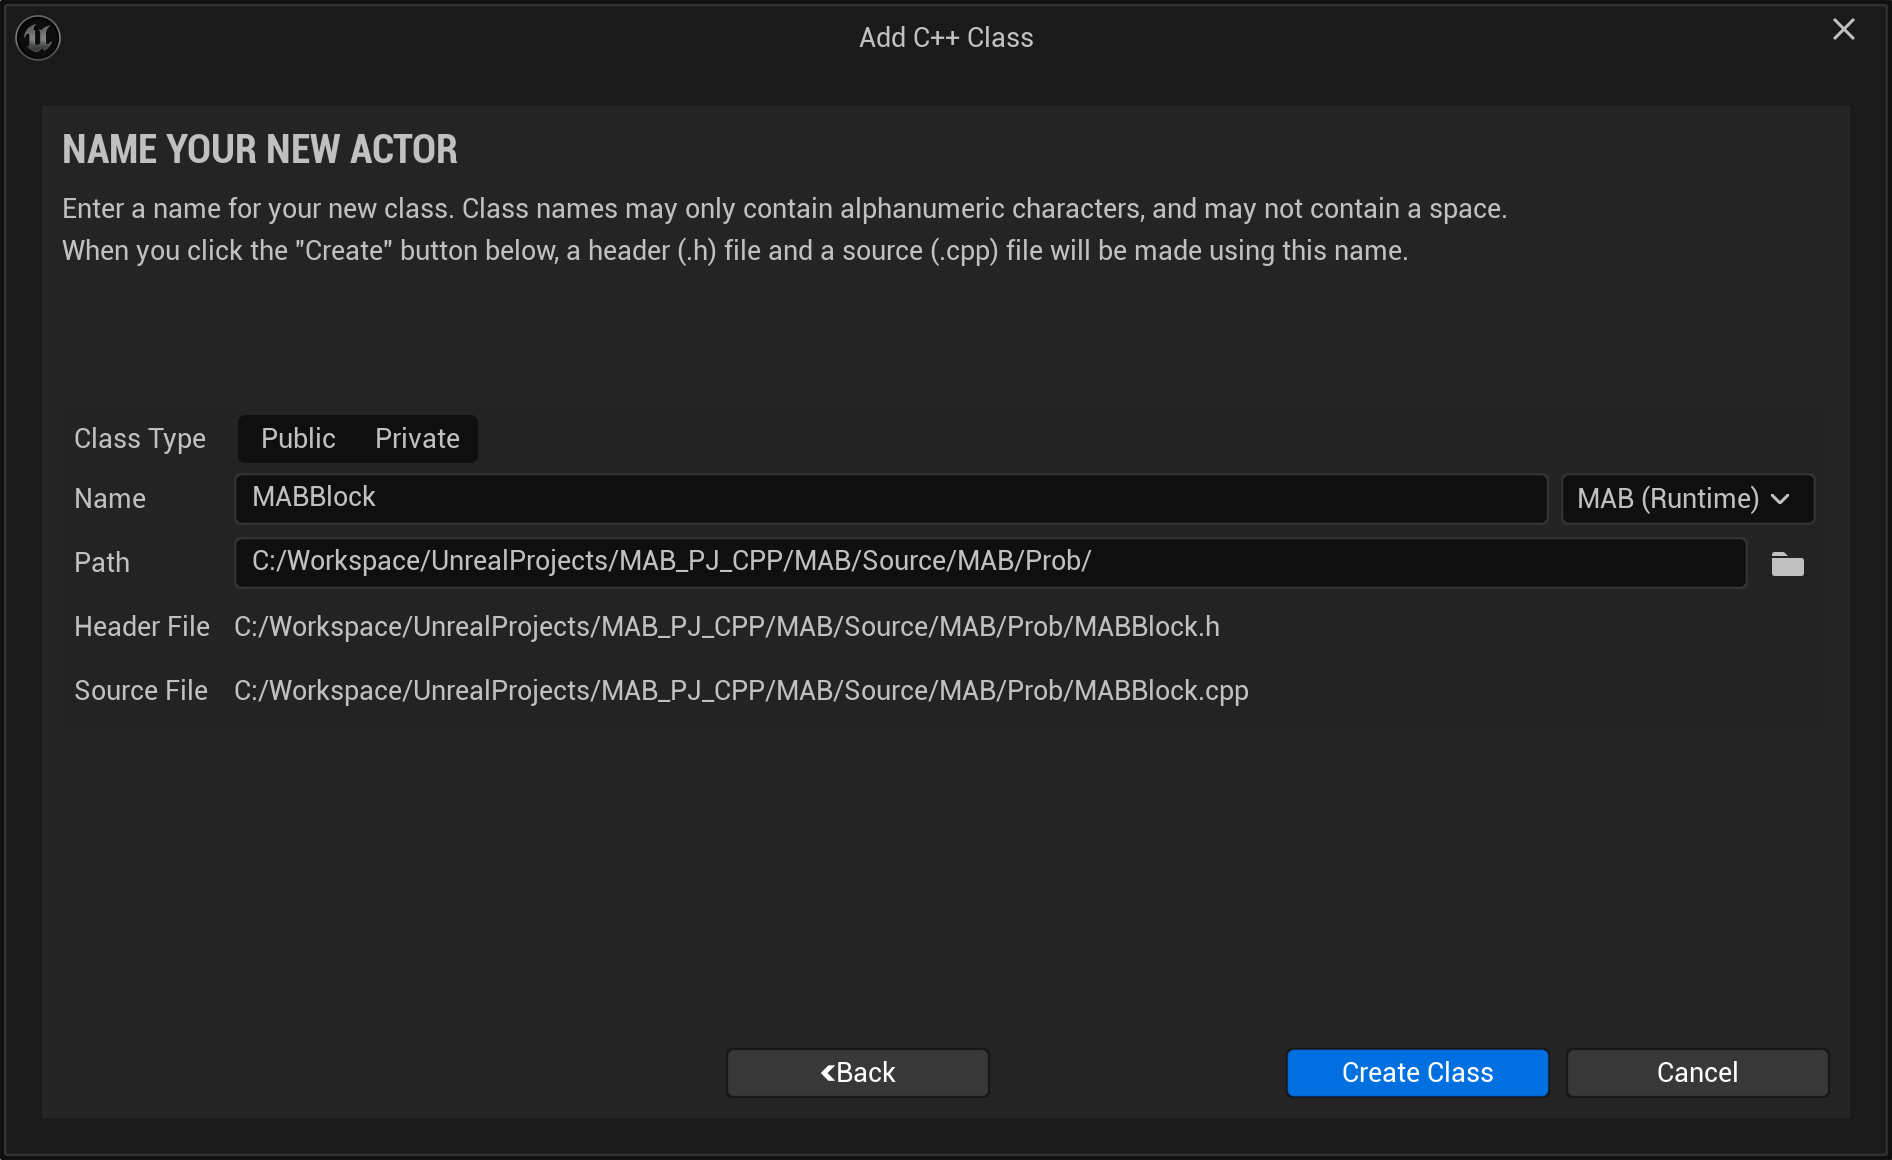
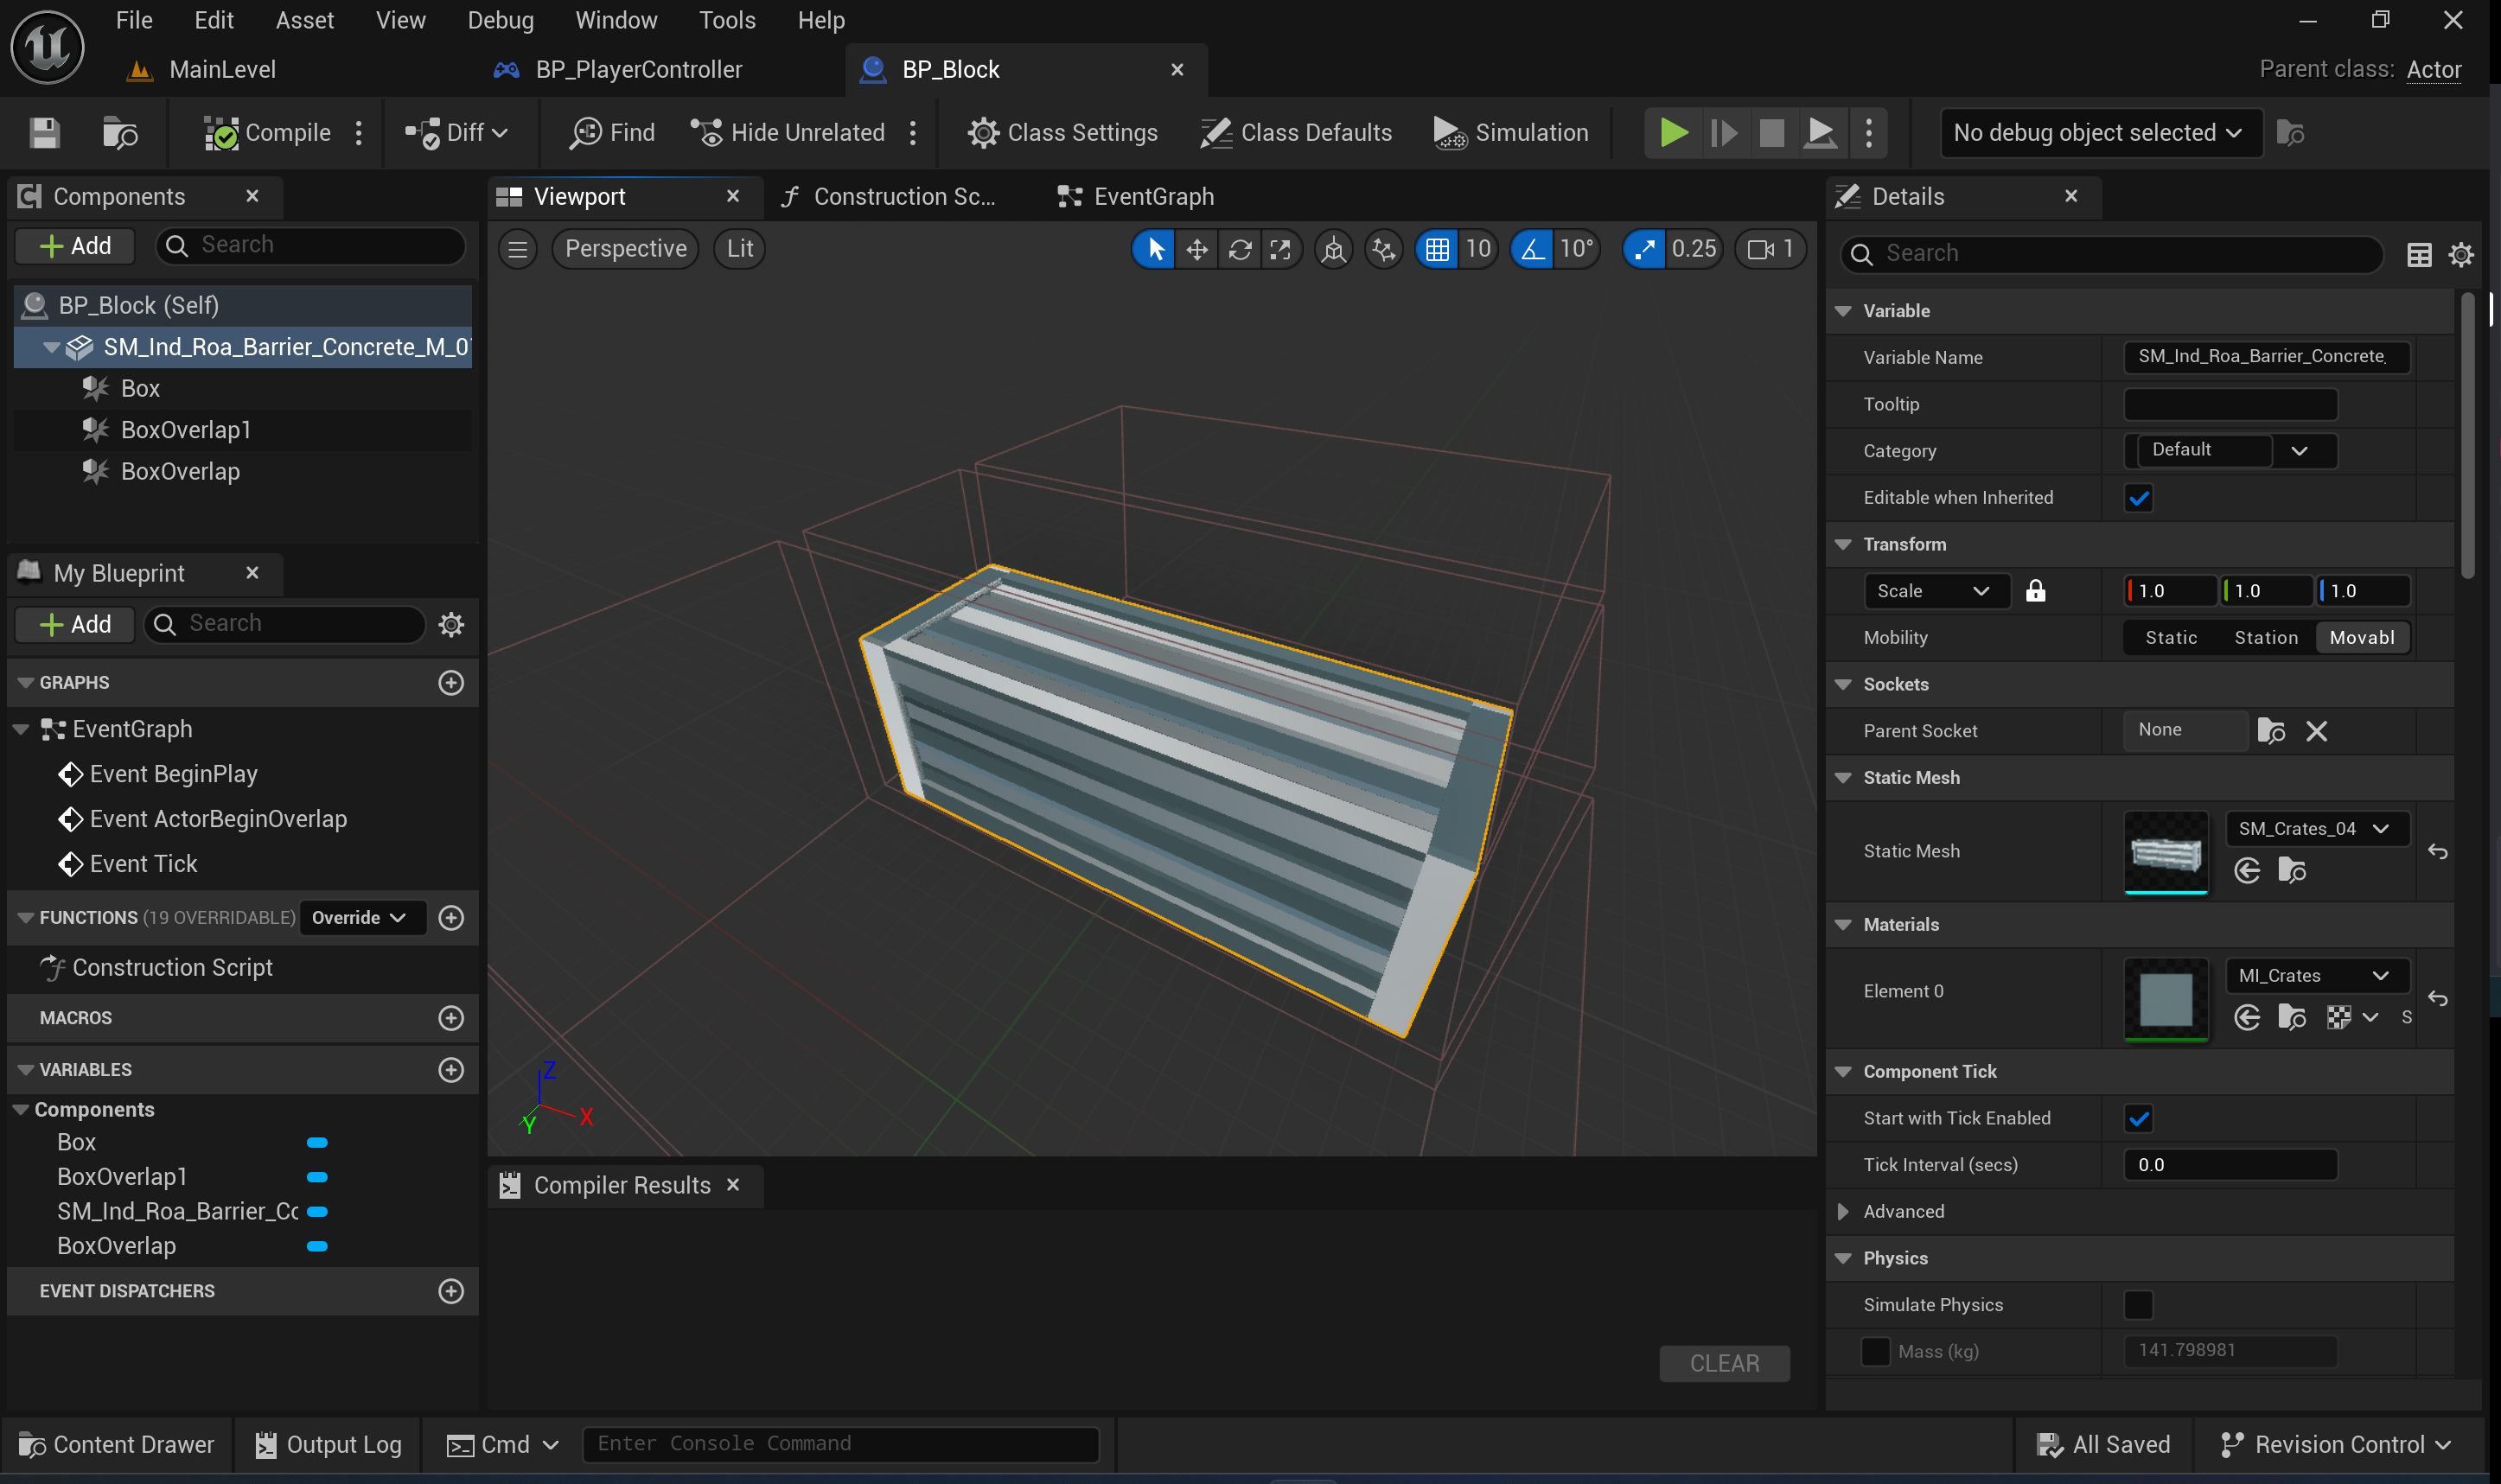
2) Mesh component, Collision component 생성, 계층구조 설정하기
	// 생성한 Actor의 public.
	UPROPERTY(VisibleAnywhere, BlueprintReadWrite, Category = Mesh)
	TObjectPtr<class UStaticMeshComponent>  Body;
생성 후 메시 오브젝트를 참조하여 할당.
	// 생성한 Actor의 생성자 내부. set mesh component.
    //  Components/MeshComponent.h.를 include해야 함.
	Body = CreateDefaultSubobject<UStaticMeshComponent>(TEXT("Body"));
	ConstructorHelpers::FObjectFinder<UStaticMesh> BodyMeshObjectRef(TEXT("/Game/Cabin_Lake/Meshes/Barrel/SM_Crates_04.SM_Crates_04"));
	if (BodyMeshObjectRef.Succeeded())
	{
		Body->SetStaticMesh(BodyMeshObjectRef.Object);
	}
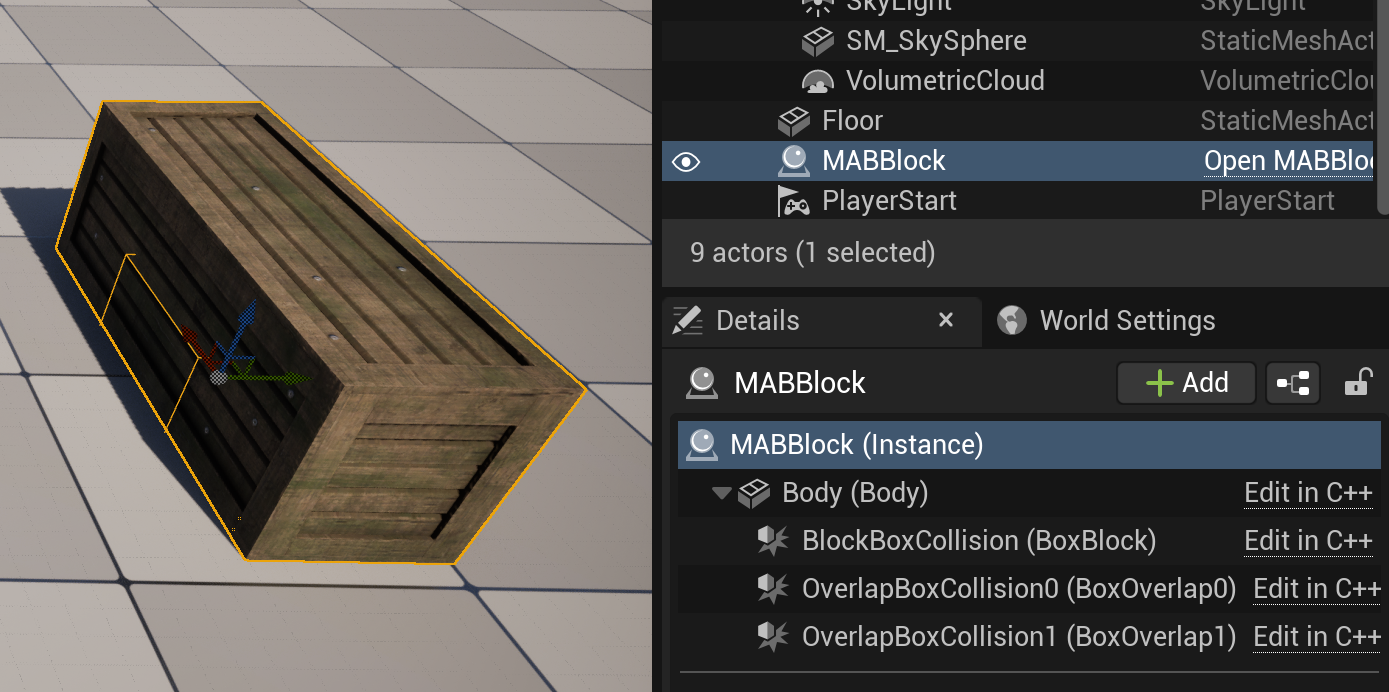
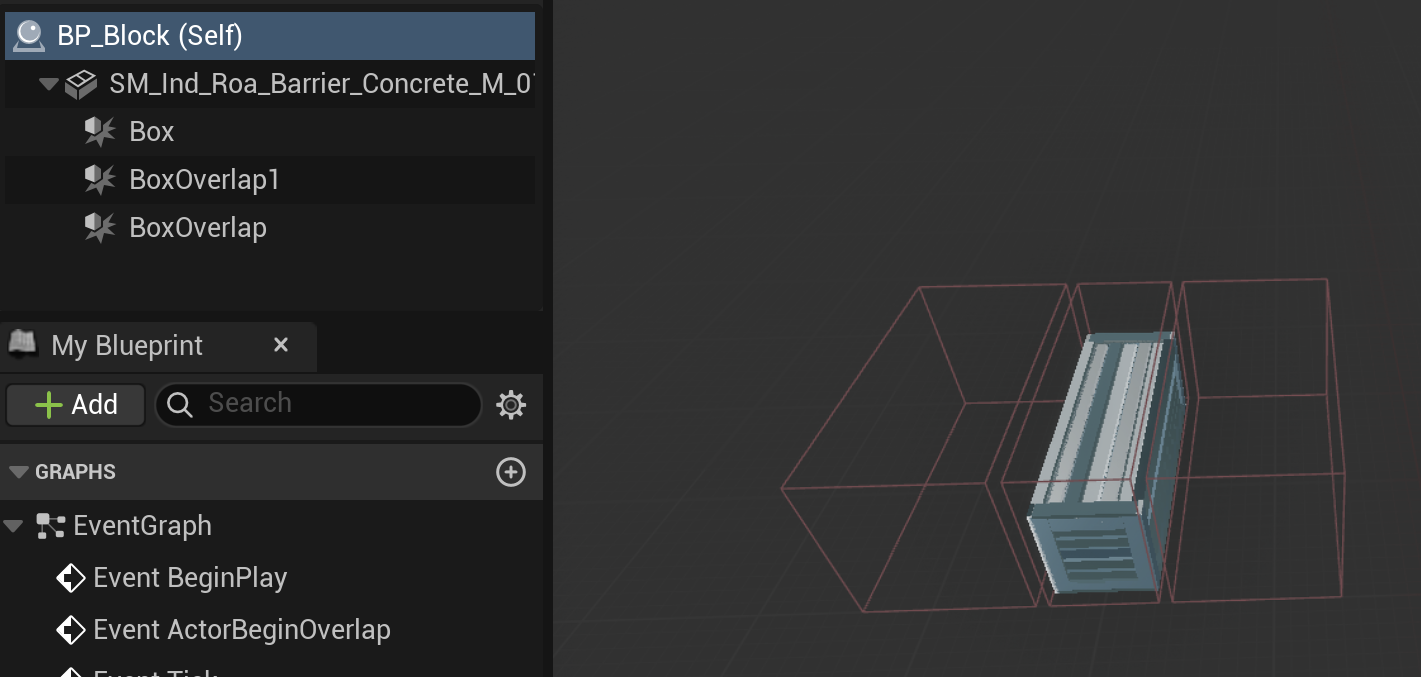
이후 블루프린트 액터의 컴포넌트들을 참고하여 다음과 같이 collision들을 추가하고 계층구조를 설정하였다.
SetupAttachment(부모)로 계층구조를 설정할 수 있다.
AMABBlock::AMABBlock()
{
 	// Set this actor to call Tick() every frame.  You can turn this off to improve performance if you don't need it.
	PrimaryActorTick.bCanEverTick = true;

	// set mesh.
	Body = CreateDefaultSubobject<UStaticMeshComponent>(TEXT("Body"));
	ConstructorHelpers::FObjectFinder<UStaticMesh> BodyMeshObjectRef(TEXT("/Game/Cabin_Lake/Meshes/Barrel/SM_Crates_04.SM_Crates_04"));
	if (BodyMeshObjectRef.Succeeded())
	{
		Body->SetStaticMesh(BodyMeshObjectRef.Object);
	}

	// set collision.
	BlockBoxCollision = CreateDefaultSubobject<UBoxComponent>(TEXT("BoxBlock"));
	BlockBoxCollision->SetupAttachment(Body);

	OverlapBoxCollision0 = CreateDefaultSubobject<UBoxComponent>(TEXT("BoxOverlap0"));
	OverlapBoxCollision0->SetupAttachment(Body);

	OverlapBoxCollision1 = CreateDefaultSubobject<UBoxComponent>(TEXT("BoxOverlap1"));
	OverlapBoxCollision1->SetupAttachment(Body);

	// set root component.
	RootComponent = Body;
}
cpp파일을 드래그하여 레벨에 배치하면 다음과 같은 모습을 볼 수 있다.
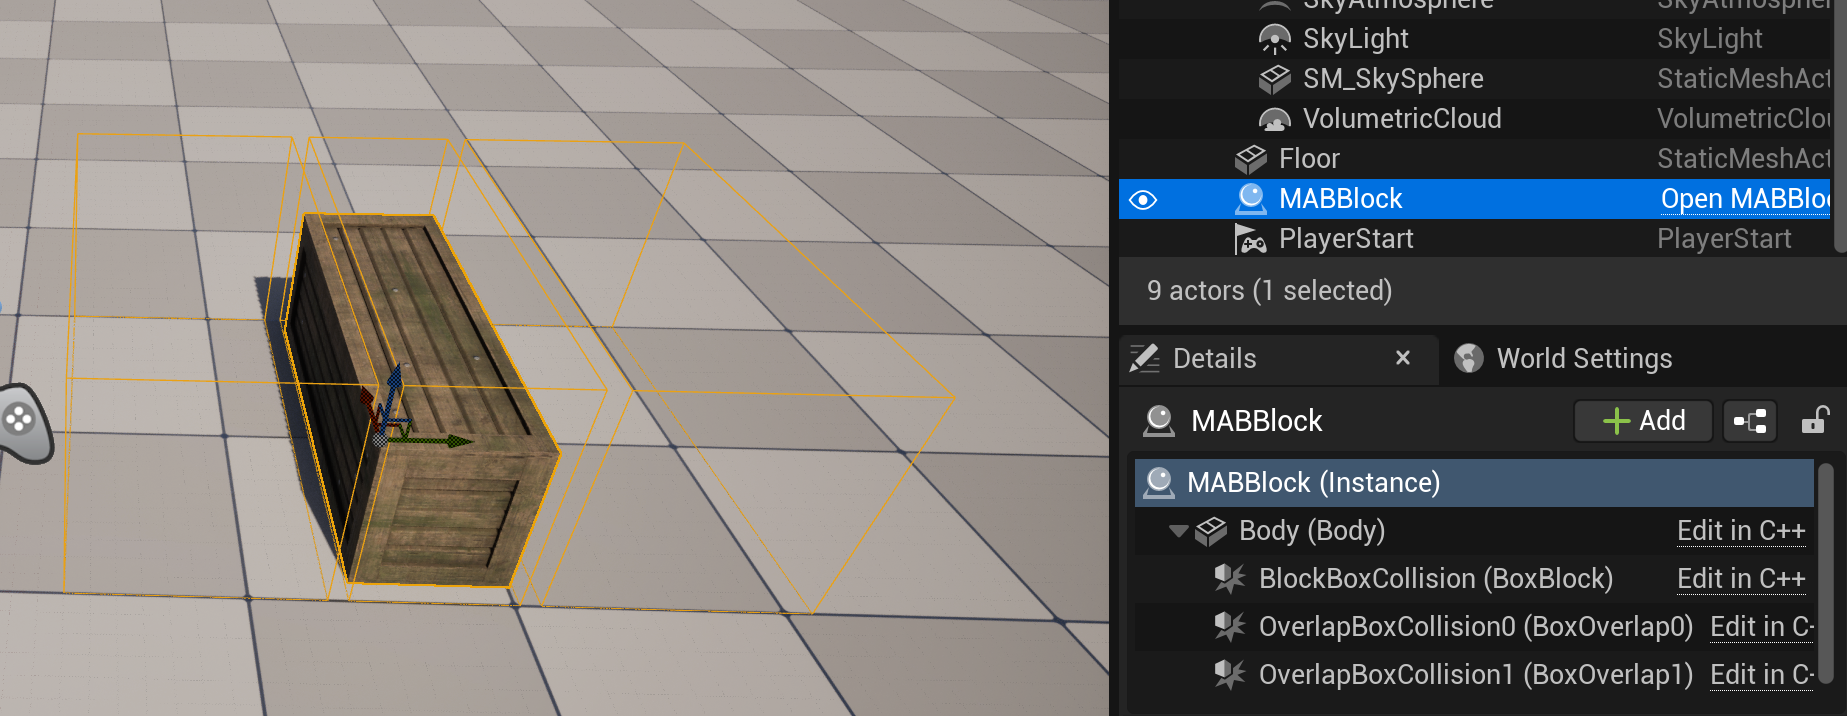
3) Transform 정보들 설정해주기
이제 저 collision을 의도에 맞게 배치할 것이다.
코드가 점점 길어져 한 collision만 보겠다.
SetRelativeLocation으로 부모를 기준으로 한 로컬 좌표계를 설정하고,
SetBoxExtent로 collision의 범위를 설정하였다.
	BlockBoxCollision = CreateDefaultSubobject<UBoxComponent>(TEXT("BoxBlock"));
	BlockBoxCollision->SetupAttachment(Body);	// 부모 계층 설정.
	BlockBoxCollision->SetRelativeLocation(FVector(0.f, 0.f, 50.f));	// 부모 기준 로컬 좌표 설정.
	BlockBoxCollision->SetBoxExtent(FVector(100.f, 32.f, 50.f));	// collision extent 설정.
결과 화면. 의도한 대로 생성했다. 이제 기능적인 부분이 필요하다.
참조와 하드코딩..
경로 관련한 부부은 하드코딩이기 때문에, 보통 cpp가 아닌 blueprint에서 지정해준다고 한다.
그 이유는,
cpp로 object reference를 복사하여 설정하면 리소스 경로가 바뀐 경우 직접 다시 설정해야 한다. (하드코딩)
하지만, blueprint로 리소스 경로를 설정한다면 경로가 바뀌어도 엔진이 경로를 재설정해준다.
'UnrealEngine5 > 프로젝트' 카테고리의 다른 글
| [UE5] Blueprint 프로젝트를 C++로 (4) Animation State Machine, Blend Space와 Blend Node (0) | 2025.04.23 |
|---|---|
| [UE5] Blueprint 프로젝트를 C++로 (3) 마우스 클릭으로 캐릭터 이동하기 (0) | 2025.04.22 |
| [UE5] Blueprint 프로젝트를 C++로 만들어보기 (3) 마우스 input 설정 (0) | 2025.04.21 |
| [UE5] Blueprint 프로젝트를 C++로 만들어보기 (2) (0) | 2025.04.20 |